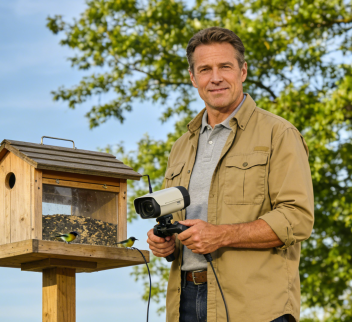
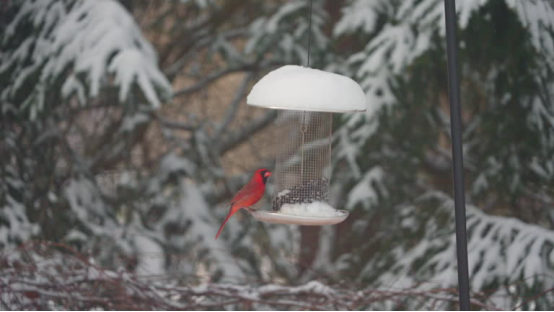
Winter birding reveals a magical world—cardinals against snow, flocks of snowbirds, and crisp, clear footage. But freezing temperatures pose real challenges for a solar bird feeder camera: icy panels, plummeting battery life, and potential device failure. A camera built for the cold, like the solar-powered bird feeder camera, combined with smart winterization tactics, can keep your watch going all season. This guide breaks down the four pillars of winter operation: hardware resilience, solar panel care, battery management, and seasonal maintenance.
Table of Contents
Pillar 1: Built-In Cold-Weather Resilience
Not all cameras are created equal for winter. Look for these specifications that form the foundation for cold-weather operation:
- Extended Temperature Range: A true outdoor bird feeder camera should operate reliably down to at least -10°C (14°F), protecting internal components from freeze damage.
- Cold-Tolerant Battery: Premium models use lithium batteries with low-temperature electrolytes, retaining a higher percentage of their charge capacity in the cold compared to standard batteries.
- Frost-Resistant Solar Panel: Panels with hydrophobic coatings shed snow and ice more easily. Monocrystalline silicon cells also maintain better efficiency in low light and cold versus older types.
- Robust Sealing (IP66 Rating): This ensures moisture and freezing air cannot ingress and cause internal condensation or component frost, which is a primary cause of winter failure.
Pillar 2: Solar Panel Care for Short, Cold Days
Winter sun is weak and fleeting. Maximize every photon with these strategies:
1. Prevent & Manage Snow/Ice:
- Install Smartly: Mount the panel in a south-facing location, tilted at a steeper angle (45-60 degrees). This captures the low winter sun and helps snow slide off naturally.
- Safe Clearing: Gently brush off heavy snow with a soft broom. Never pour hot water on a frozen panel—thermal shock can crack it. Let sunlight or ambient thawing do the work.
- Choose Location: If possible, place the camera under an eave or in a spot sheltered from direct, accumulating snowfall.
2. Maximize Limited Sunlight:
- Clear Obstructions: With leaves gone, ensure no new shadows from structures fall on the panel during the core winter sunlight hours (10 AM – 2 PM).
- Keep It Clean: Wipe the panel clean of dust, frost, and bird droppings weekly. A clean surface significantly improves energy harvest in low-light conditions.
Pillar 3: Preserving Battery Life in the Cold
Cold chemistry slows down, reducing battery capacity. Combat this by conserving power and minimizing heat loss.
1. Reduce Power Consumption:
- Adjust Video Settings: Lower the resolution from 2K/4MP to 1080p. Disable energy-intensive features like full-color night vision if you don’t need nighttime monitoring.
- Optimize Motion Settings: Fine-tune the motion detection sensitivity to avoid being triggered constantly by falling snow or blowing leaves.
- Limit Live Streaming: Use the live view sparingly. Rely on motion-triggered recordings and notifications instead of a constant stream.
2. Simple Insulation Tactics:
- Wind Block: Positioning the camera body so it’s shielded from prevailing winds can help maintain a slightly higher operating temperature.
- Natural Insulation: Avoid mounting the camera on a bare metal pole, which saps heat. A wooden post or an insulated sleeve can provide a marginal benefit.
Pillar 4: Winter Installation & Maintenance Routine
- Accessible Height: Install at a height (1.5-2 meters) that remains accessible for gentle snow clearing and maintenance, even with some ground accumulation.
- Check Connections: Periodically ensure the cable connection between the solar panel and camera body is secure, dry, and free of ice.
- Monitor Battery via App: Use the companion app to check the battery level regularly. If a long, cloudy spell drains it below 30%, plan a manual recharge in a warm indoor environment.
- Keep Feed Full: A large seed capacity means fewer refilling trips in the cold, reducing disturbance and the chance of letting cold air into the feeder compartment.
FAQ: Your Winter Bird Feeder Camera Questions
- What if the temperature drops below the camera’s rated minimum?
- A: The camera may shut down to protect itself. For extreme climates, consider a model with a wider temperature range or be prepared to temporarily bring the battery indoors for periodic warm recharges.
- My solar panel is covered in ice for days. Will the battery die?
- A: A quality camera with a large battery can often last 5-7 days on a full charge without sun. If an ice storm is forecast, a preemptive manual charge can provide a safety buffer.
- Is the reduced battery life in winter permanent?
- A: No. It’s a temporary effect of low temperature. The battery’s capacity will return to normal as temperatures rise in spring.
- Can I use an external battery pack or heater?
- A: It’s not recommended to modify the camera with unapproved accessories, as this can void warranties and cause issues. Choose a camera whose native design meets your winter needs.
Conclusion: Embrace the Winter Watch
A winter-ready solar bird feeder camera opens up a serene and beautiful dimension of backyard birding. By understanding the technology’s limits and applying practical winterization steps—proper panel angling, power management, and simple maintenance—you can ensure a steady stream of life and activity at your feeder, even on the coldest days.
Don’t let winter silence your feeder. Explore a solar-powered bird feeder camera engineered for four-season reliability and keep your bird watch going strong.