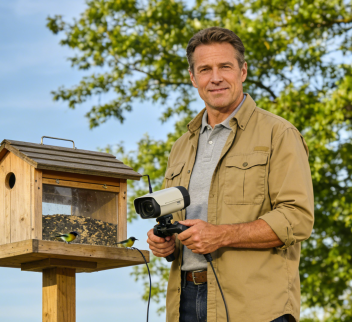
Hummingbirds are the dazzling jewels of the American backyard. Their iridescent colors, blinding speed (50+ wingbeats per second), and magical hovering flight make them a dream to watch and a challenge to capture. With the right strategy and a capable bird feeder camera, you can transform that challenge into stunning, consistent results. This guide will walk you through the exact steps to attract hummingbirds and configure your camera to perfectly photograph their most captivating moments.
Table of Contents
Step 1: The Lure – Setting Up the Perfect Hummingbird Diner
Hummingbirds are discerning guests. To attract them reliably, you need the right food and setup.
The Ideal Nectar Recipe:
- Mix: A simple 1-part white sugar to 4-parts water solution. Boil briefly to dissolve sugar and inhibit microbial growth, then cool completely.
- Avoid: Never use honey (can promote fungal growth), artificial sweeteners (no nutritional value), or red dye (unnecessary and potentially harmful).
- Maintenance: Change the nectar and thoroughly clean the feeder every 3-5 days, more often in hot weather. A clean feeder is non-negotiable for attracting and keeping hummingbirds healthy.
Feeder Placement for Attraction & Camera Work:
- Open Flight Path: Place the feeder in an open area with 3-5 feet of clear space around it, allowing hummingbirds to approach and hover comfortably.
- Near Natural Food Sources: If possible, position it near bright, tubular flowers they naturally visit (like bee balm, trumpet vine, or salvia).
- Quiet and Safe: Keep it away from active squirrel feeders, bird baths with splashing, or areas frequented by pets.
Step 2: Camera Placement – Framing the Perfect Shot
Where and how you mount your camera is critical for capturing fast, tiny subjects.
- Distance: Position the bird feeder camera 50-80 cm (20-30 inches) from the feeder ports. This is close enough for great detail but far enough not to disturb the birds.
- Height & Angle: Mount the camera at or slightly below the level of the feeder. Angle it slightly upward to focus on the space where the birds will hover. This perspective highlights their vibrant throats (gorgets) and underbellies.
- Lighting: Aim for a spot with bright, indirect light. Avoid pointing the lens directly into the sun to prevent harsh shadows and overexposure. The camera’s wide dynamic range (WDR) feature will help balance bright and dark areas.
Step 3: Camera Settings – Freezing the Blur of Motion
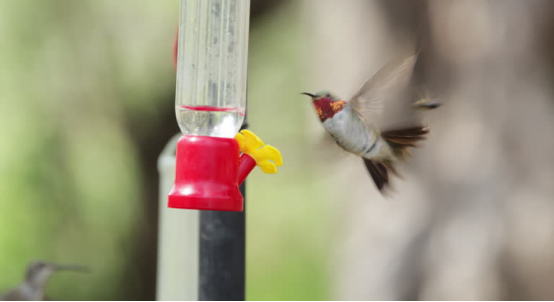
This is where a smart bird feeder camera earns its keep. Configure these settings to capture razor-sharp images.
- Maximize Motion Sensitivity: In the app, set the motion detection sensitivity to High. This ensures the camera triggers the instant a hummingbird zips into the frame.
- Prioritize Speed & Resolution: Select the highest resolution available (3MP or 4MP) to capture feather detail. Ensure settings prioritize a fast shutter speed to freeze wing motion. Some cameras have a dedicated “Action” or “Fast Motion” mode.
- Enable Smart Alerts: If your camera has AI bird identification, make sure it’s enabled and set to send notifications specifically for “Hummingbird.” This way, you get an alert for your target subject, not every passing finch.
- Consider Lighting Modes: For visits at dawn or dusk, ensure color night vision or a low-light mode is enabled so you don’t miss early or late activity.
Pro Techniques for Award-Winning Shots
- Create a Clean Background: Position the camera so the background behind the feeder is simple—a wall of greenery, a blue sky, or a neutral fence. This makes the iridescent bird pop in the frame.
- Use Water to Your Advantage: Place a gentle misting sprinkler or drip source near the feeder. Hummingbirds will dart through the water to bathe, offering incredible action shots.
- Patience is a Lens: It may take a few days for hummingbirds to discover a new feeder. Once they do, they are creatures of habit. Consistent maintenance and a steady camera will reward you with regular visits.
FAQ: Your Hummingbird Photography Questions
- How long until hummingbirds find my feeder?
- A: In areas with hummingbirds, it can take 2 days to 2 weeks. Be patient and ensure the nectar is fresh.
- Can the camera really freeze a hummingbird’s wings?
- A: A high-quality bird feeder camera with fast trigger speeds and good resolution can capture remarkable detail, often showing individual wing positions in a hover.
- Will the solar panel keep up with constant recording?
- A: Yes. A well-sized solar panel (like a 3W+ system) paired with a large battery can easily power frequent motion-triggered recordings throughout the day.
- What if multiple hummingbirds fight at the feeder?
- A: This is common! A wide-angle lens will capture the drama. The AI may identify each bird, and you’ll get a sequence of exciting interaction shots.
Conclusion: Your Window to a Dazzling World
Attracting and photographing hummingbirds is immensely rewarding. By combining the right nectar, strategic feeder placement, and a bird feeder camera optimized for speed and clarity, you set the stage for success. You’ll not only enjoy their live visits but also build a stunning gallery of images that capture the sheer wonder of these aerial acrobats.
Ready to turn your backyard into a hummingbird studio? Explore an AI bird feeder camera designed to capture fast-moving wildlife in stunning detail and start building your portfolio today.