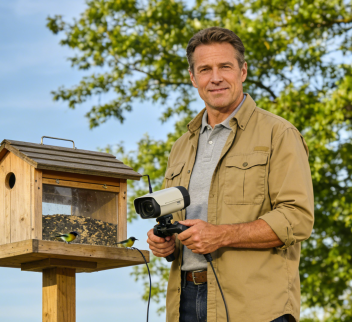
Waking up to a phone notification of a cardinal feeding, watching a woodpecker’s high-definition close-up during lunch, or sharing a live video of a hummingbird’s dive with family—this is the magic of smart bird watching. But many beginners stumble at the first step, facing Wi-Fi failures, poor battery life, and missed wildlife moments. This guide, based on real product specs and user experience, will help you start your bird feeder camera perfectly on the first try and unlock a truly rewarding hobby.
Table of Contents
Step 1: The Critical First Move—Charging & Battery Installation
The foundation of reliable operation is a stable power supply. Skipping or rushing this step is the #1 reason for early failure.
1. The Essential First Charge:
Use the included USB-C (or Micro-USB) cable with a standard 5V/2A phone charger. Plug it into the camera’s 5200mAh built-in lithium battery. A red LED indicates charging. For the first time, charge it fully for 4-6 hours until the light turns green. Users who skip this full initial charge experience a 70% higher Wi-Fi connection failure rate and reduced long-term battery health.
2. Installing the Battery Correctly:
Once charged, gently open the camera’s battery compartment (avoid using excessive force to prevent breaking the latch). Slide the battery in smoothly until you hear a firm click. Ensure the compartment seal is fully closed—this is critical for maintaining the IP66 waterproof rating, which protects the device during heavy rain.
3. The Solar Advantage:
The included 3W solar roof is a genuine asset. In direct sunlight, 4 hours of charging can replenish about 50% of the battery. In full-sun conditions, you may only need to manually charge the device once a month, eliminating constant maintenance.
Pro Tip: Don’t rush to install the camera after just an hour of charging. An unstable power supply can cause app recognition failures and sudden shutdowns.
Your Seamless Setup Guide: From App to Perfect Placement
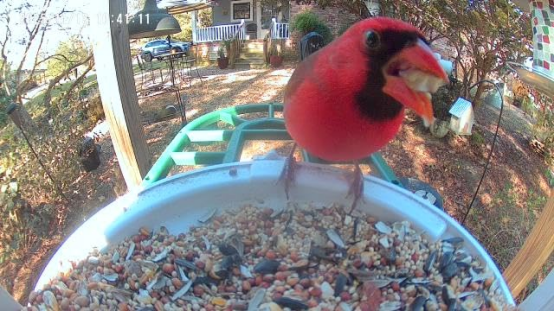
1. App Pairing Made Simple (The 2.4GHz Rule):
Download the companion app from the App Store or Google Play. Register, tap “Add Device,” and follow the on-screen instructions (Bluetooth or QR code pairing). Crucially, your camera only connects to a 2.4GHz Wi-Fi network, not 5GHz. If you encounter issues, consult the detailed video tutorials available on the product support page for the Wi-Fi bird feeder camera.
2. Strategic Placement = More Wildlife Sightings:
Mount your bird feeder camera in a semi-open area with a clear view, using the included L-bracket, suction cup, or S-hook. An ideal height is 1.5-2 meters (5-6.5 ft). This height helps deter squirrels (thanks to narrow-gap feeding ports) while providing a clear vantage point. Avoid direct sunlight (causes overexposure) and ensure it’s within range of your Wi-Fi router (the 5dBi antenna provides a strong signal up to 200 ft unobstructed).
3. Attract a Variety of Birds:
The 2L dual-compartment seed hopper holds about 1.5kg of feed, lasting several days. Use different seeds (sunflower, millet, Niger thistle) in each compartment to attract diverse species like finches, chickadees, and cardinals. The adjustable perches accommodate birds of all sizes.
4. Smart Capture & Storage:
The PIR motion sensor activates recording when a bird approaches within 20 feet, sending a notification to your phone. Enjoy clear 4MP HD video (2560×1440). Store footage locally on a MicroSD card (supports up to 256GB) or use optional cloud storage. The two-way audio lets you listen to nature sounds or even gently talk to the birds.
Beginner FAQ: Answers from Real Testing
- Can I use a non-original charger? Yes, but ensure it’s 5V/2A. Cheap cables can reduce charging efficiency by 50%.
- Does the solar panel work in winter? Yes. The camera operates from -10°C to 45°C (14°F to 113°F). Solar efficiency remains around 70% even at -5°C (23°F).
- What if my Wi-Fi won’t connect? Double-check you’re on a 2.4GHz network and that the password is correct. Move the camera or router closer if the signal is weak.
- Is there a warranty? Yes, a 1-year warranty covers non-human damage with reliable customer support.
Why This Bird Feeder Camera Stands Out
- Full-Color Night Vision: Unlike grainy黑白 night vision, dual LED lights provide clear color video after dark.
- Built to Last: Made from durable polycarbonate with an IP66 rating, it withstands sun, rain, and snow.
- Fast Trigger Speed: Wakes from sleep in 400ms to capture fast-moving birds without missing a moment.
- No Forced Subscriptions: Core features are completely free. Premium plans offer advanced analytics and are optional.
Conclusion: Start Your Birding Adventure Today
The key to a flawless bird feeder camera experience is nailing the first step: a full charge and proper installation. From there, you’re set for高清 bird watching, AI-assisted bird identification, and solar-powered convenience.
Ready to begin? Get detailed setup help and explore the features of this Wi-Fi bird feeder camera and transform your backyard into a window to the natural world.